Installation
Let's install OIBus in less than 2 minutes.
Requirements
To operate, OIBus must be installed on an environment with the following minimum characteristics:
- 64 bits architecture. 32bits and ARM architectures are not supported.
- RAM: 2GB minimum. OIBus may require more RAM depending on the configuration of South and North connectors.
- Disk space: 200 MB. For the application. It is however recommended to have extra space (several GB, depending on your data stream) to store the collected data in the cache if an upstream network failure occurs.
- Admin rights on the environment to install OIBus and register it as a service (for Windows and Linux).
- Modern web browser (IE not supported). Used to access the OIBus configuration interface. The browser can be on the targeted computer or on another, provided you have configured the necessary access.
Installation steps
- Windows x64
- Linux
- MacOS
Installation
With the Windows Installer
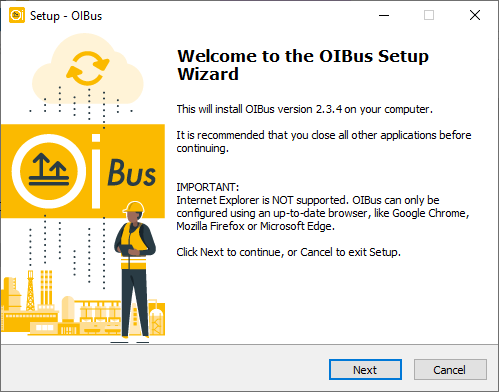
- Run the Windows Installer, you should see the following welcome screen:
-
Accept the EU-PL license and the OPCHDA license.
-
Choose the path where you want to install the binaries.
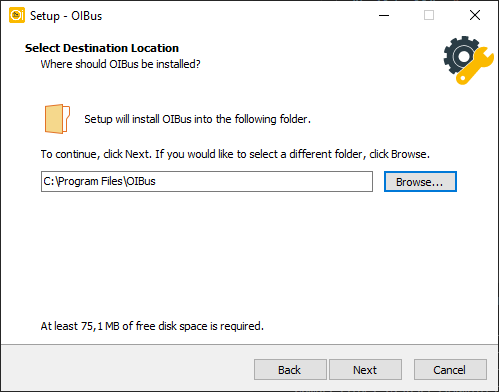
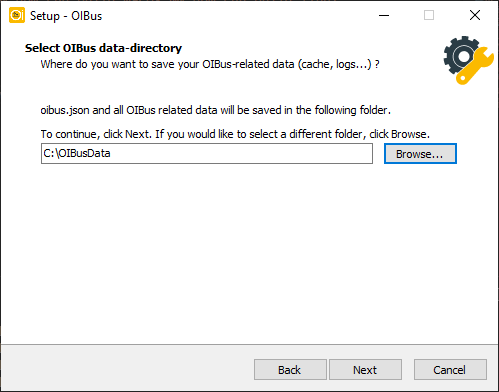
- Choose the path where you want to store the cache, logs and configuration files
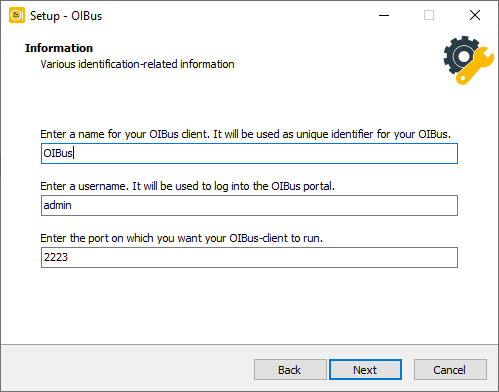
- The next step offers you to tune the following OIBus settings:
- The OIBus name (default
OIBus) - The admin name (default
admin) - The port to use (default
2223)
- Validate the settings and wait for the installer to extract and copy the files in the appropriate folder.
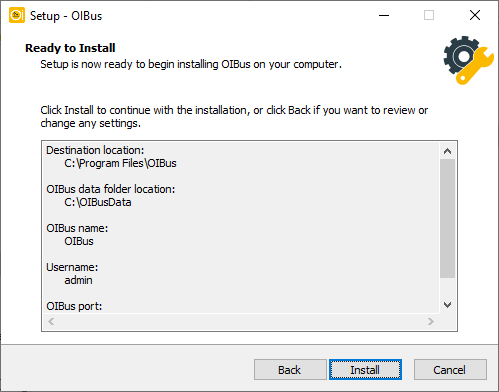
- The final screen confirms the installation. You can click on the link at the bottom to directly access OIBus from its web interface.
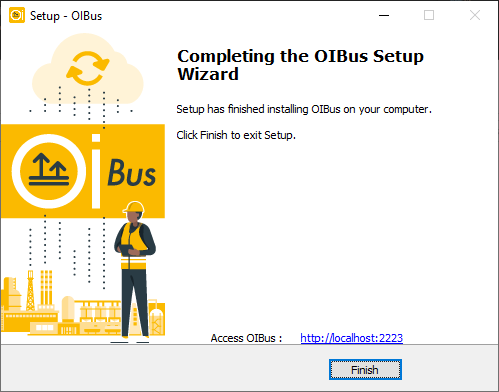
Note that Internet Explorer is not supported.
Update
With the Windows Installer
In case of OIBus update, you can use the OIBus Windows Installer and specify the already existing executable and config path. You can choose to keep the existing configuration file or overwrite it.
During the update, OIBus service will be stopped briefly.
The configuration file oibus.json will be updated to its latest version during the first startup.
With binaries
Alternatively, you can download the zip file containing the OIBus executable and other dependencies.
- Go to the Windows service manager.
- Stop the OIBus service.
- Copy and paste the content of the zip file into the OIBus executable folder. Overwrite all existing files.
- Start the OIBus service.
The configuration file oibus.json will be updated to its latest version during the first startup.
To install or update OIBus, you should run the installation script. To do that, you may either download from the above button and unzip the downloaded file, or use the following cURL or Wget command:
curl -o- -L https://github.com/OptimistikSAS/OIBus/releases/download/v2.11.0/oibus-linux.tar.gz | tar -xzv
wget -c https://github.com/OptimistikSAS/OIBus/releases/download/v2.11.0/oibus-linux.tar.gz -O - | tar -xzv
The following files have been extracted:
default-config.json     // default configuration that will be updated during the installation process
oibus                   // OIBus binary
oibus-setup.sh          // installation script
oibus-uninstall.sh      // uninstallation script that will be updated during the installation process
Bash scripts have been tested on Ubuntu. They interact with the user to fill the first OIBus configuration, and set OIBus as a service. Alternatively, it is possible to run OIBus binary only.
Installation of OIBus as a Linux service
The installation script can be run with the following command. The admin rights will que required during the script execution.
./oibus-setup.sh
The following questions will be asked during the installation (default answers have been kept in this example):
Administrative permissions are required to proceed. Do you wish to continue? (Y/n)
Administrative permissions granted.
Enter the directory in which you want to install the OIBus binary (default: ./OIBus/):
Enter the directory in which you want to save all your OIBus related data, caches, and logs (default: ./OIBusData/):
Enter a username for your session. It will be used every time you log into OIBus (default: admin):
Enter a name for your OIBus. It will help to identify your OIBus, and assist in potential troubleshooting (default: OIBus):
Enter the port on which you want OIBus to run (default 2223):
Installing oibus service...
Service file successfully created. Enabling oibus service startup on system boot...
Created symlink /etc/systemd/system/default.target.wants/oibus.service → /etc/systemd/system/oibus.service.
Starting OIBus service...
Setting oibus-uninstall.sh...
Installation procedure completed !

Useful commands:
        Check service status:   sudo systemctl status oibus
        Check service-logs:     sudo journalctl -u oibus -f

Access OIBus: http://localhost:2223/
Update
To update OIBus, download the latest version, unzip the archive and run the setup install:
./oibus-setup.sh
During the installation process, fill the OIBus directory and OIBus data directory with the already existing directories. At start, OIBus will automatically update the configuration file (oibus.json) and the cache structure if needed. Here is an output example, the default values:
Administrative permissions are required to proceed. Do you wish to continue? (Y/n)
Administrative permissions granted.
Enter the directory in which you want to install the OIBus binary (default: ./OIBus/):
Enter the directory in which you want to save all your OIBus related data, caches, and logs (default: ./OIBusData/):
An oibus.json file was found. Do you want to use it for this OIBus? (Y/n)
Stopping oibus service...
Removed /etc/systemd/system/default.target.wants/oibus.service.
The oibus service has been stopped and disabled!
Installing oibus service...
Service file successfully created. Enabling oibus service startup on system boot...
Created symlink /etc/systemd/system/default.target.wants/oibus.service → /etc/systemd/system/oibus.service.
Starting OIBus service...
Setting oibus-uninstall.sh...
Installation procedure completed !

Useful commands:
        Check service status:   sudo systemctl status oibus
        Check service-logs:     sudo journalctl -u oibus -f
Uninstall OIBus
An uninstallation script has been created in the OIBus binary folder. Once in this folder, enter the following command:
oibus-uninstall.sh
Here is an output example:
Administrative permissions are required to proceed with uninstall. Do you wish to continue ? (Y/n)
Administrative permissions granted.
Do you wish to remove all OIBus data (cache, logs...)? All data, credentials and logs about your current OIBus will be permanently erased. (y/N) y
Removed /etc/systemd/system/default.target.wants/oibus.service.
OIBus service was successfully removed.
By default, the data are kept if you want to reinstall OIBus later. You can remove them, but you will lose all credentials and the whole OIBus configuration.
Run OIBus in standalone
If you want to run OIBus without installing it as a service, once the archive downloaded and unzipped, you can run the following command:
./oibus --config ./OIBusData/oibus.json
Make sure the OIBusData folder already exists. The cache, logs and configuration files are stored in this folder (in the
example OIBusData).
Apple chip Mac (M1) are not supported yet with binaries. However, it is possible to start OIBus from the source code!
MacOS OIBus binary can be run through its executable. Once unzipped, start a Terminal and enter the following command:
./oibus --config ./oibus.json
The ./oibus.json file path must be adapted according to the place where the OIBus cache and config will be stored.
For example, if the binary is stored in /bin/ and the cache and configuration files are stored in
~/test/oibus-data, the command will be:
/bin/oibus --config ~/test/oibus-data/oibus.json
Be sure to have admin permissions to run the binary
Access OIBus interface
OIBus configuration interface is available on http://localhost:2223 (assuming the default port has been kept).
By default, the user is admin and the password is pass.
We strongly advise to change the password in the Engines settings.
When installing OIBus, remember to choose an appropriate name. The Engine name is important mainly if you use several OIBus and send the logs to a remote loki instance.