ADS - TwinCAT® → OIAnalytics®
Beforehand
This use case shows how to set up an ADS connector and how to send the resulting CSV files into OIAnalytics.
Details regarding the configurations can be located on the North OIAnalytics and South ADS connectors pages.
South ADS
Ensure that you are familiar with the network configuration required to access the ADS server from the OIBus machine, as detailed in the connector documentation.
Let's consider two implementation scenarios:
- OIBus directly installed in the PLC, which includes the ADS router.
- OIBus installed on a separate machine, or on the same machine but without direct access to the ADS router, which can be accessed via another local network.
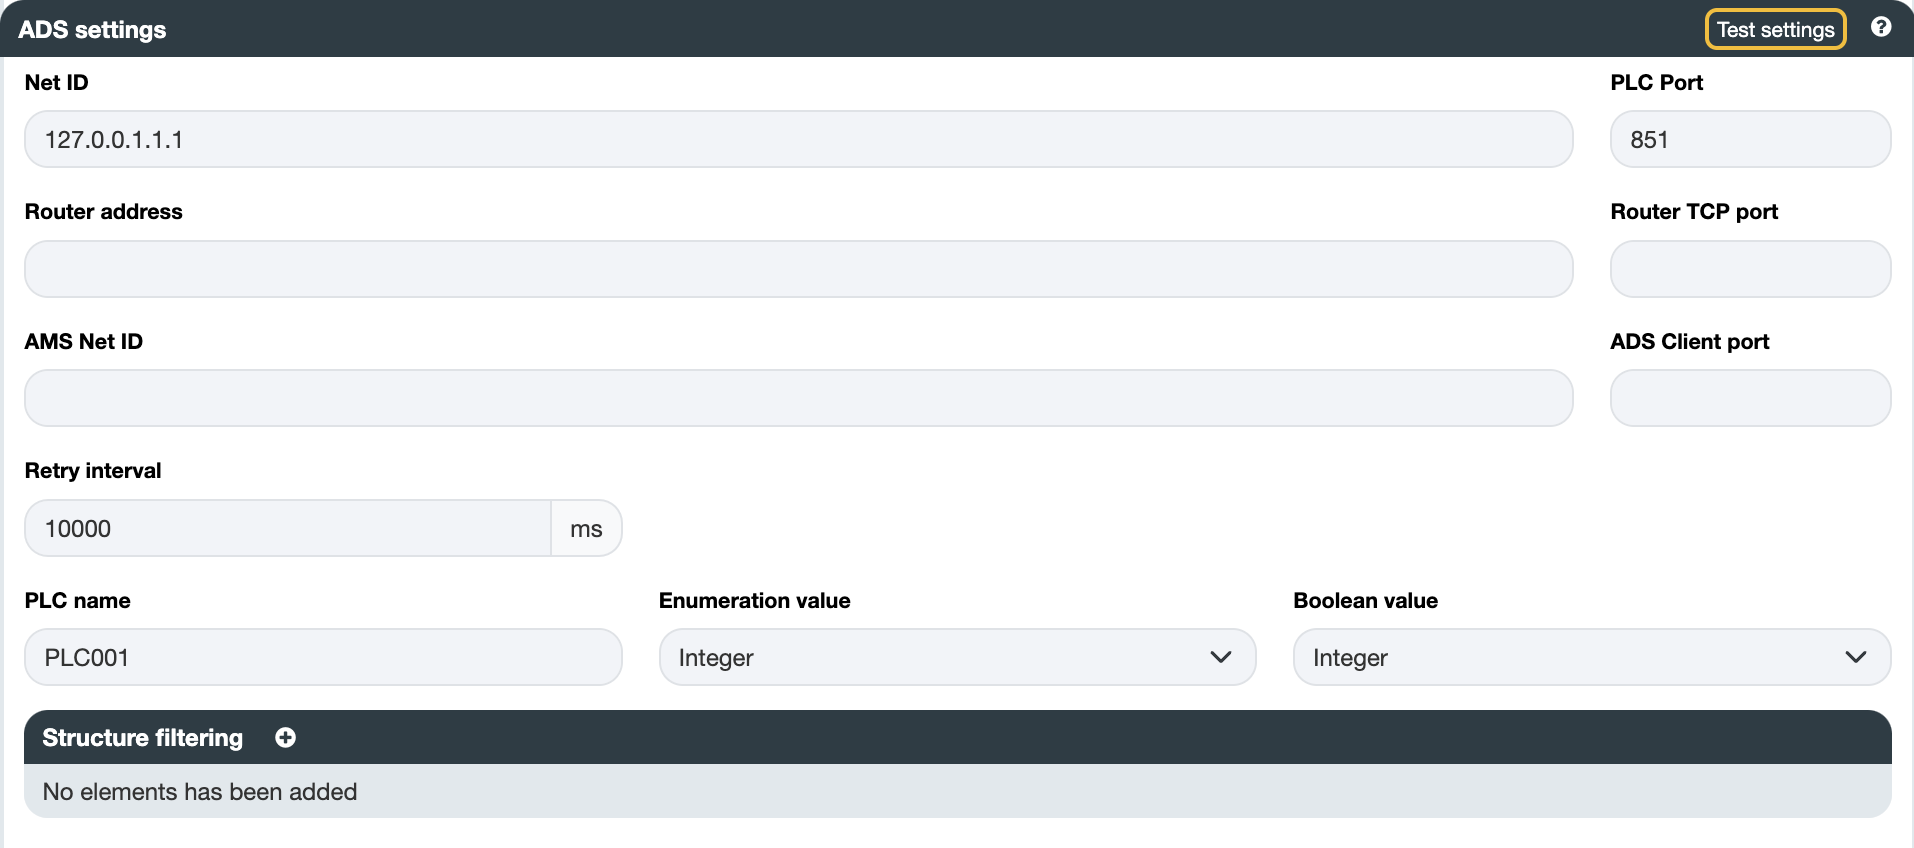
Local ADS
In this scenario, OIBus is directly installed on the same machine than the ADS router. Only the ADS Net ID needs to be specified (here
127.0.0.1.1.1).

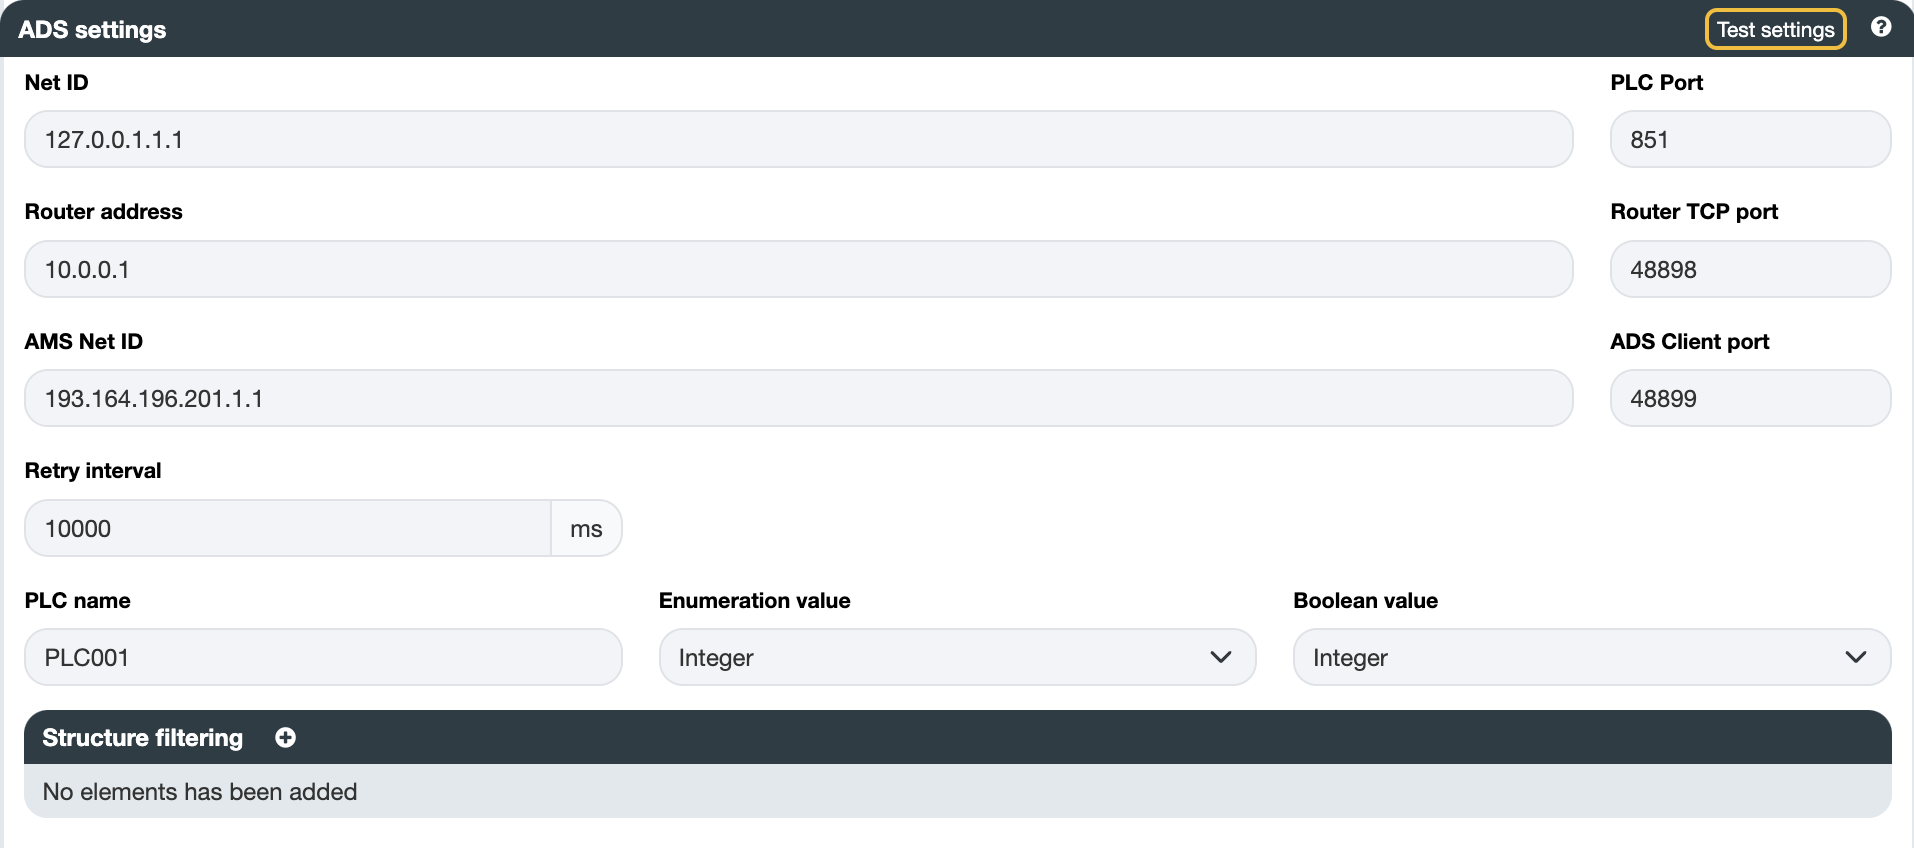
Remote ADS
In this scenario, OIBus is deployed on a remote virtual machine. Initially, it needs to establish connectivity with the ADS Router located
at address 10.0.0.1 on port 48898. Additionally, an AMS Net ID matching the static route configured on the AMS Server (located on the
TwinCAT machine) needs to be provided. For instance, here the AMS Net ID is specified as 193.164.196.201.1.1, where the first segment
(193.164.196.201) typically corresponds to the IP address of the OIBus machine.
The ADS Client port is used to establish the connection between the ADS router and the PLC. It's essential to designate an unused port for
this purpose, such as port 48899 in this example.

Test settings button. :::Items
Include the addresses you intend to read. Consult the person responsible for the PLC to identify the available addresses. Choose a scan mode to retrieve the data.

For bulk item import, start by clicking the Export button to obtain a CSV file with the correct columns. Each line
in the file will correspond to a new item. Ensure that the names are unique.
The ADS connector is frequently employed for accessing PLCs, and there are scenarios where multiple PLCs with the same namespace need to be accessed.
To streamline this process, OIBus allows you to import items from a CSV file, which can be the result of exporting from another ADS
connector. However, note that the names will be the same between the two connectors. To distinguish them, utilize the PLC name field from
the connector settings section (here PLC001).
The PLC name will be appended in front of all item names, providing a unique identifier.
North OIAnalytics
Verify that the OIAnalytics platform is accessible from the machine where OIBus is installed. To check this, enter the OIAnalytics URL in
your web browser's address bar (here https://instance.oianalytics.fr). If the page loads correctly, OIAnalytics is reachable. If not,
ensure that your network firewall permits the connection.
A connection issue might be due to a port rule (HTTPS / 443, although very unlikely) or a domain name rule. Consult your IT team to add a rule allowing communication.
A best practice for sending values into OIAnalytics is to register OIBus first.
Create the OIAnalytics North connector and populate the relevant fields. If OIBus has been registered into OIAnalytics, check the
Use OIAnalytics registration toggle.
You can test the settings by clicking the Test settings button to verify the connection.
Confirm accessibility of the OIAnalytics platform from the machine hosting OIBus. To do so, type the OIAnalytics URL
(https://instance.oianalytics.fr) into your web browser's address bar. If the page loads successfully, OIAnalytics is reachable. If not,
ensure that your network firewall allows the connection.
Connection issues may arise from a port rule (HTTPS / 443, though unlikely) or a domain name rule. Consult your IT team to add a rule permitting communication.
For optimal functionality, it is recommended to register OIBus before sending values to OIAnalytics.
If OIBus has been registered with OIAnalytics, activate the Use OIAnalytics registration toggle.

You can verify the connection by testing the settings using the Test settings button.

