OPC UA™ → OIAnalytics®
Beforehand
See the North OIAnalytics® and South OPC UA™ connector pages for full configuration details.
Make sure to select OPC UA as your protocol — it is entirely different from OPC Classic™. The example uses the following fictional network.

South OPC UA
The OPC UA server URL follows this structure:
opc.tcp://<host>:<port>/<name>
host— hostname or IP address of the server (e.g.10.0.0.1)port— port on which the server listens (e.g.53530)name— name assigned to the OPC UA server (e.g.OPCUA/SimulationServer)
Example: opc.tcp://10.0.0.1:53530/OPCUA/SimulationServer
Set the security mode your server requires. If it differs from None, also specify the security policy. Avoid None in production — use it only for testing. Obtain credentials or certificates from your IT team or the OPC UA server administrator.
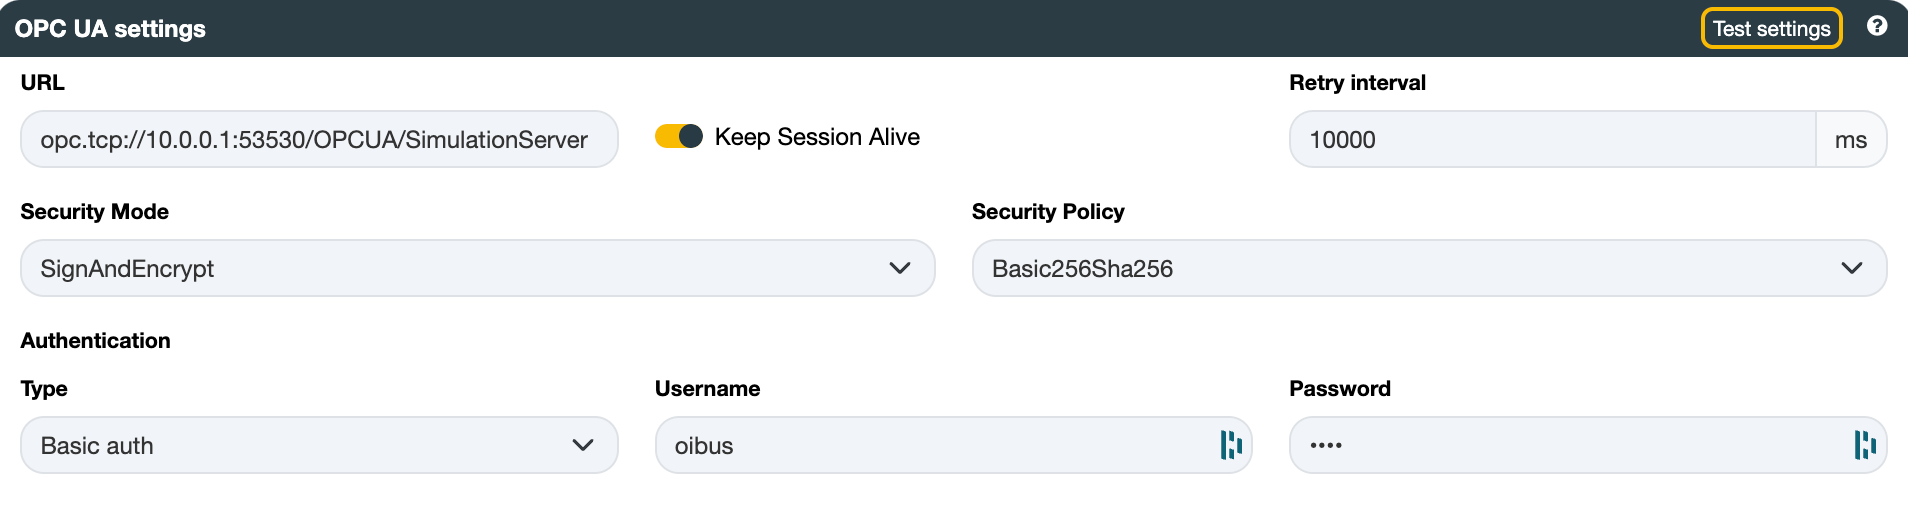
Click Test settings to verify the connection before saving.
Items
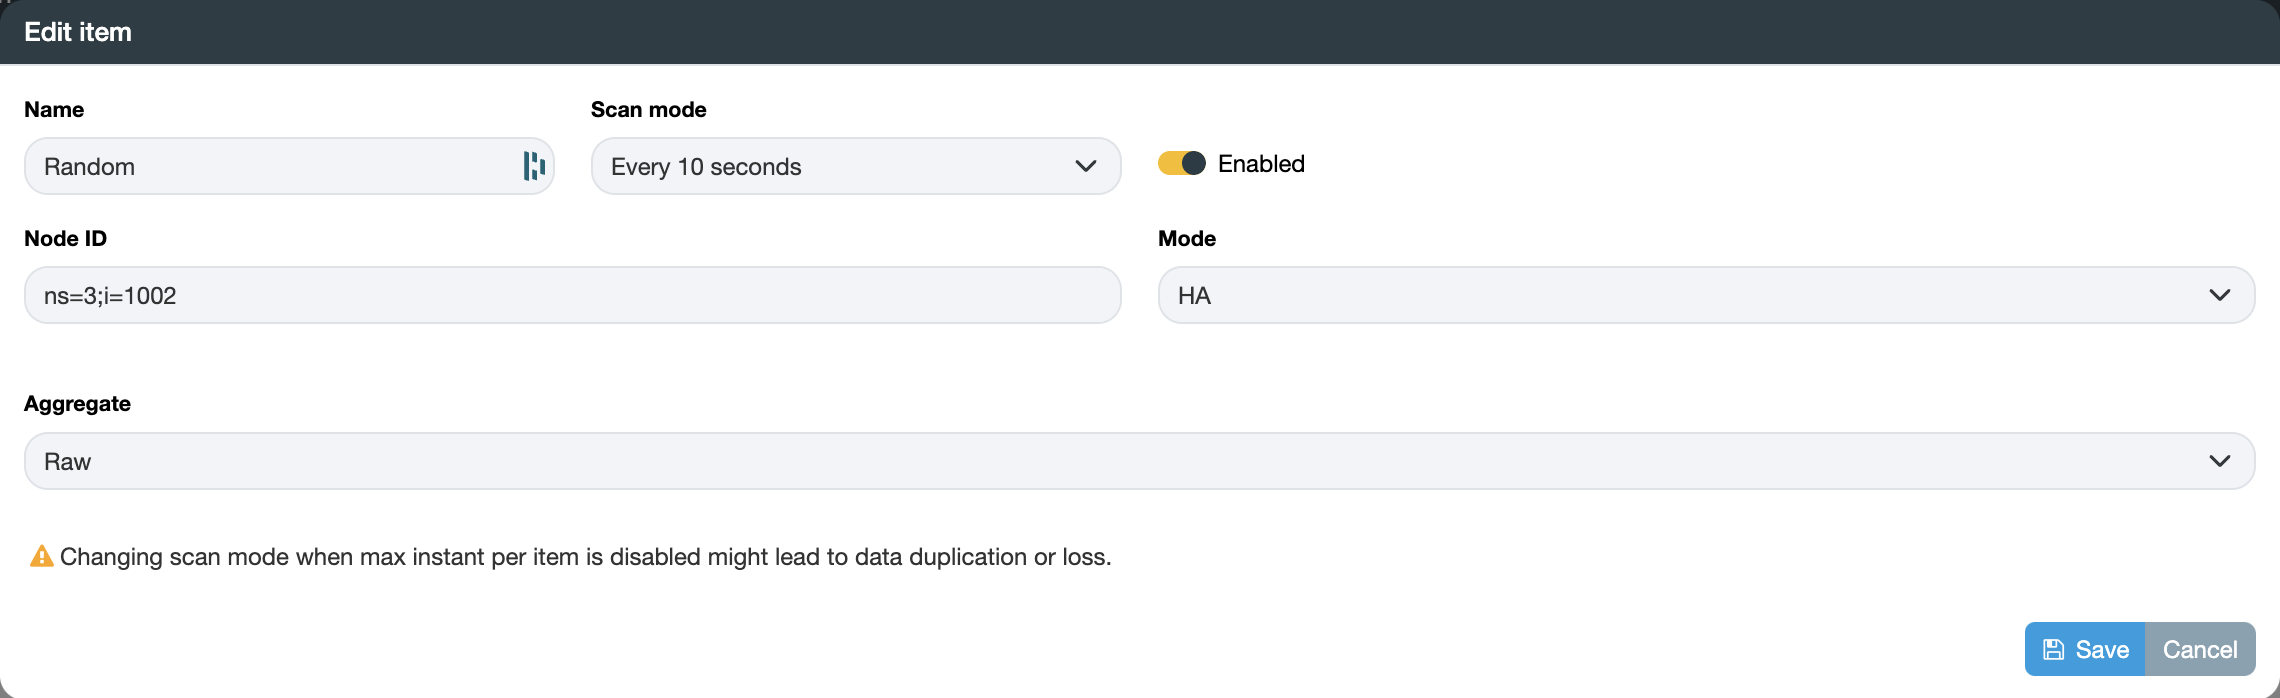
Add the node IDs you want to read. Ask the OPC UA server administrator for the list of available nodes.
Choose the access mode (DA or HA). In HA mode, OIBus retrieves all values recorded since the last query and can aggregate or resample them — check with the server administrator which aggregates are supported. If unsure, use the Raw aggregate. In DA mode, OIBus retrieves one value per item per scan.
Select a scan mode to control the collection interval.
Click Export to download a CSV template with the correct columns, fill in one item per row, then import it back. Item names must be unique.
North OIAnalytics
Before setting up the connector, verify that OIAnalytics is reachable from the OIBus host: open a browser on the OIBus machine and navigate to the OIAnalytics URL (e.g. https://instance.oianalytics.fr). If the page does not load, ask your IT team to allow the connection — the issue is typically a domain name firewall rule or, less commonly, a port rule on HTTPS/443.
For the best experience, register OIBus with OIAnalytics before creating the connector. Once registered, enable the Use OIAnalytics registration toggle in the connector settings so credentials are managed automatically.

Click Test settings to verify the connection before saving.